Operator Management
If you’ve created your bot, you might wonder who can see and reply to user messages. Usually, only the bot owner can do this. But by registering your bot on SmartBotsLand, you can unlock a powerful feature: adding operators to help you manage messages and support users.
What is a Telegram bot operator?
How to Set an Operator in Your Bot?
1. Log in to your admin panel (dashboard).
2. From the “Bot Users” menu, click on “All Users” to see your user list.
❗ If the list is empty, open your bot and send the command
/startto become at least one user.
3. Find the user in the displayed list.![]()
4. Find your desired user in the list.
-
Click the “Set Operator” icon next to their name.
-
Enter a name for the operator. (Only you will see this name.)
-
Choose whether this operator is an Admin or NotAdmin.
-
✅ Admins can receive daily reports
-
❌ Normal operators ( admins) do not get daily reports
-
-
Toggle Receive Registered User Report if you want this operator to get notified when users sign up using the signup button or maker.
-
Select the operator and set the new role for them.

- Click on the “Save” button.

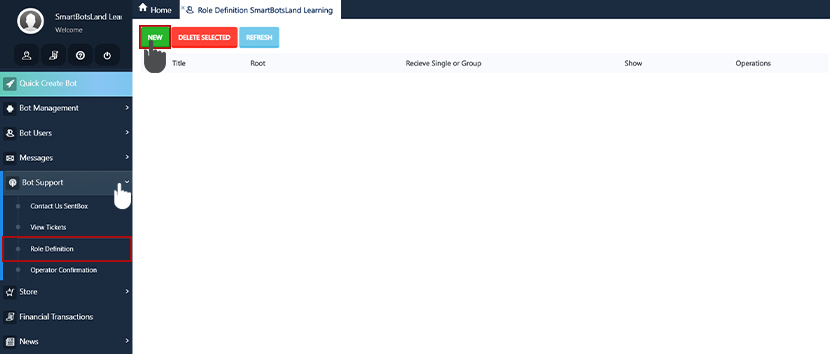
Role definition
To define a role, you must go through the following steps:
1. Enter your admin panel.
2. Click on “Role definition” from the “Operator Management And Support” menu.
3. On the new page, click on the “New” button.
4. On the new page, you’ll see several options. Here’s what each one means:

- Title: Choose a descriptive name for your role that will be visible to bot users. Consider names like “Financial Team” or “Support Team” that communicate the role’s function.
- Root: You can define roles within a hierarchy, making it easier to organize responsibilities. From here, you can select the main role to which your new role will be subordinate.
- Number of buttons in a row: If you have numerous roles and wish to display them to users for selecting the appropriate unit to send a ticket to, you can specify the number of roles shown in each row from this section.
- Show: From this section, you can determine whether this role is visible to the user or not.
- Receive single or group: Choosing “Individual receive” ensures that requests from users are exclusively directed to one operator assigned to that role. On the other hand, selecting “Group receives” sends user requests to all operators with that role simultaneously.
- Active in Key: In this section, you can define the button that activates and displays the role for Contact With System and Send Ticket to the user.
Once the role is created, return to the operator settings to give them this role.
Note 1: Your operator’s name is only visible to you as the owner of the panel.
Important Tip
Tip: You can only specify normal users as operators. Groups or channels cannot be registered as operators.
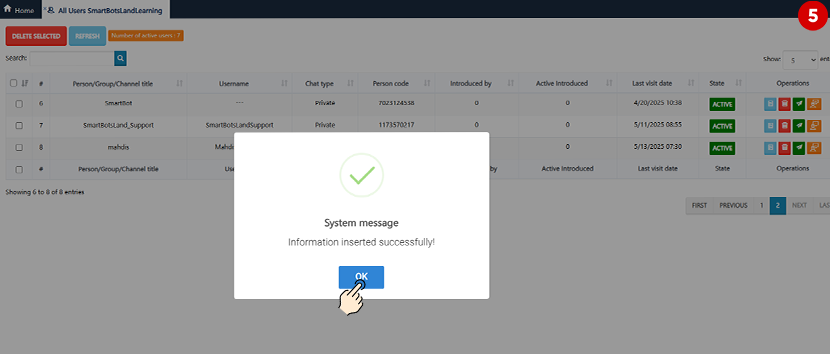
Now the user is successfully registered as an operator in your system.
For access to your registered operators and other settings, simply select “Operator Management” from the “Operator Management And Support” menu.
Operator Management
On this page, you can view and manage the list of your operators.
You can perform the following actions:
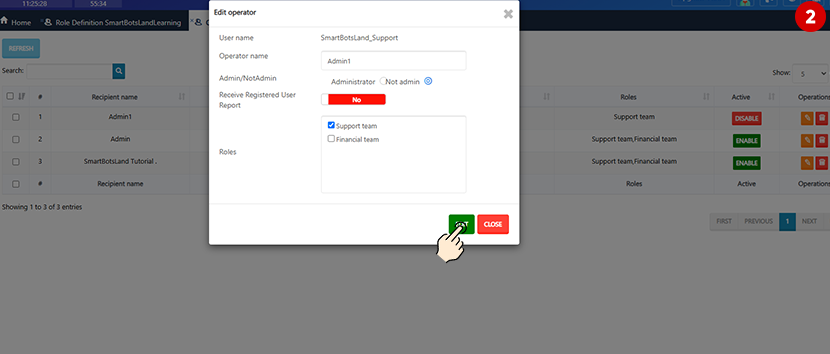
-
Edit Operator Name
-
Change Operator Access Level
-
Activate or Deactivate Operators
Manage your team easily and keep your support organized!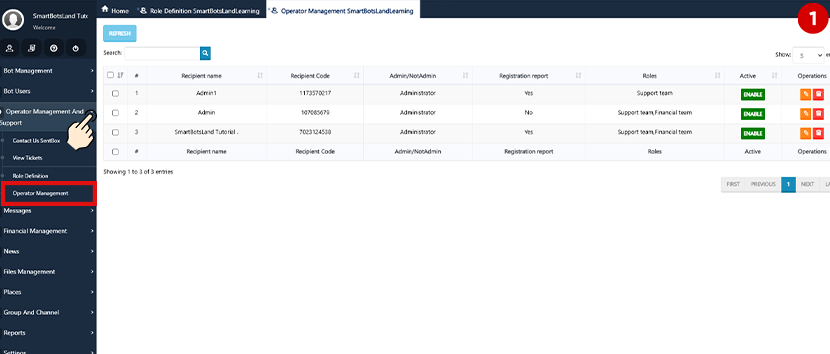


[…] Tip: learn how to set operator for your bot […]
[…] Related: Defining the operator and assigning a role to it […]
[…] Related: How to active “Contact with the system” button […]
[…] Related: How to set the operator? […]