Uploading files
Have you ever wanted to share files or images with your bot users? Or do you need to send specific files to individual users? Simplify your bot experience with SmartBotsland’s file storage feature. By uploading files and images to your management panel, you gain effortless access whenever you need them. Plus, with categorized files, finding what you need is a breeze. Let’s explore how this handy tool can make managing your bot a breeze.
How to upload files in SmartBotsLand?
There are only three ways to upload files to Smartbotsland:
- Direct upload.
- Upload via Telegram bot.
- Upload through the admin panel (dashboard).
Now, I’ll walk you through each one, making it easy for you to choose the one that suits your needs best.
Direct upload
With direct upload, effortlessly transfer files or photos from your device to the panel for immediate utilization.
Note: Keep in mind that larger files may take some time to upload, or there may be issues with the upload process.
The direct upload feature can be utilized across various sections of the panel. Whether you’re adding content to buttons, sending group messages, or elsewhere, direct upload simplifies the process.
Upload Files via Telegram Bot
Easily upload files or images of any size directly through your Telegram bot using this method. Follow the steps below to organize and manage your uploads effectively in SmartBotsLand:
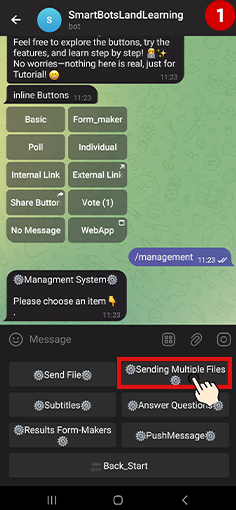
Uploading Multiple Files
If you want to send multiple files at once:
-
Send
/managementin your bot. -
Tap the “Sending Multiple Files” button.
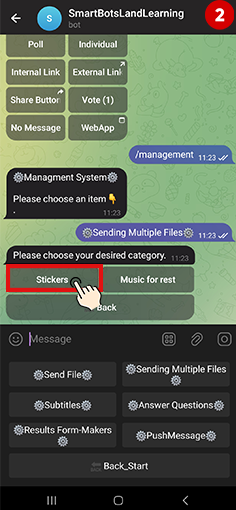
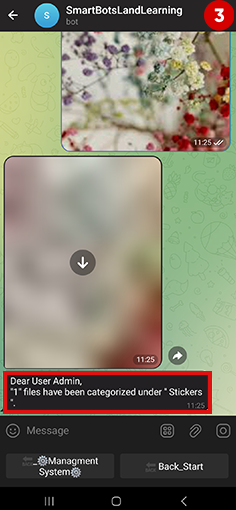
-
Select your “desired category” before uploading.
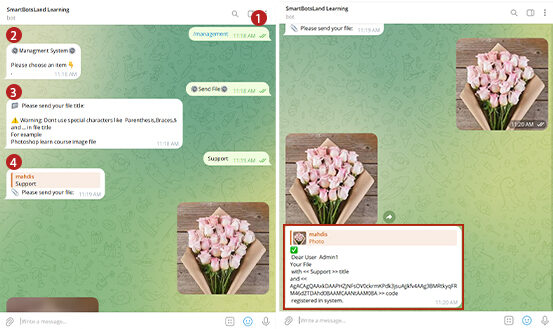
How to Upload Files via Bot:
-
Open your bot and send the command:
/management -
Tap the “Send File” button.
-
Enter a title for your file when prompted.
-
Upload your file or image directly in the chat.
4. Next, head over to your admin panel (Dashboard).
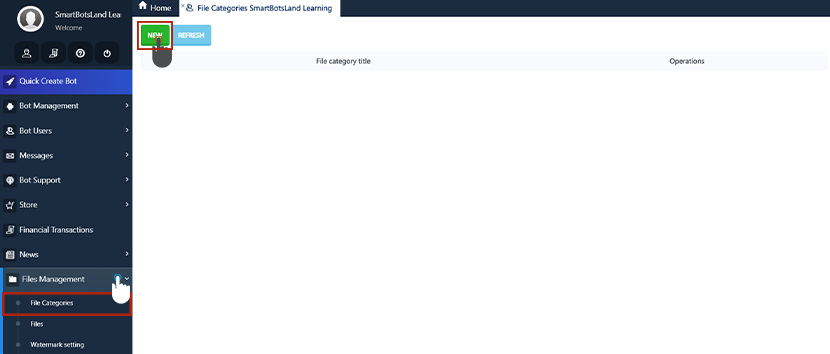
5. Click on “File Categories” from the “File Management” menu.
6. Finally, click on the “New” button and set your category title. Consider organizing categories as subsets for better organization.
Tip: You can consider some categories as subsets of other categories.
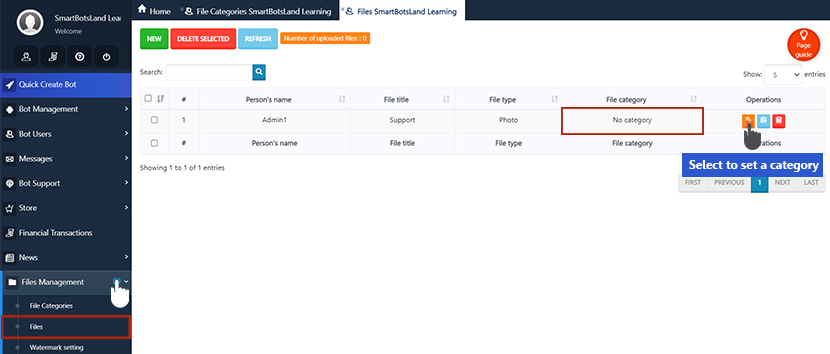
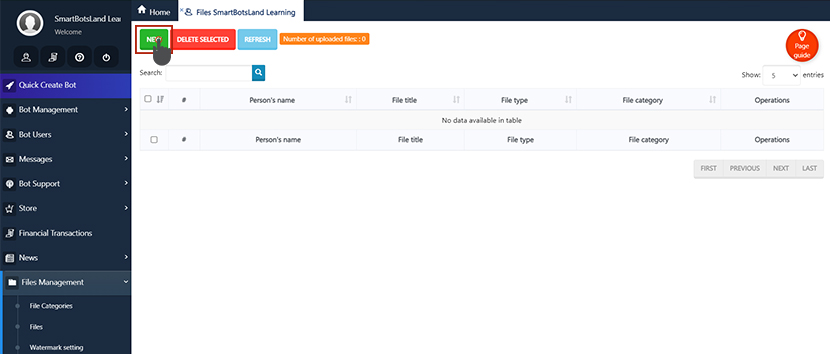
7. Upon uploading the file via your bot, you’ll find detailed information about it, including the following:
Person’s name: The name of the operator who uploaded this file.
Title: The name you’ve assigned to the file within your bot.
Type: Indicates the format of the uploaded file.
Category: Specifies the category under which the file is classified.
However, since the file was uploaded via the bot, it won’t have a category assigned yet. To utilize the file effectively, you’ll need to assign it to a category.
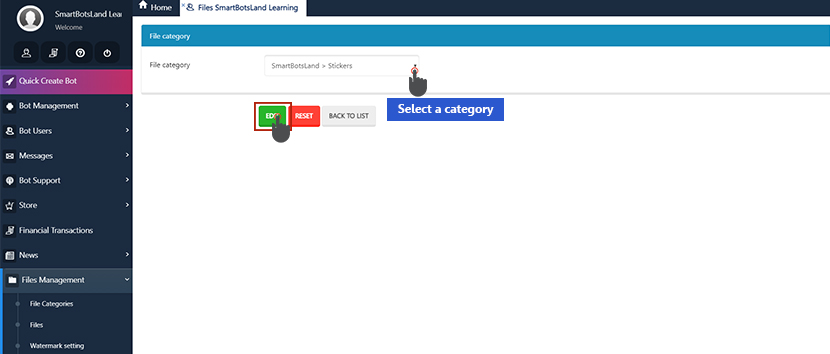
The process of assigning categories to the file:
1. Click on the “edit” icon in front of your file.
2. On the new page, you can choose your file category.
3. Then click on the “Edit” button.
Operations:
Edit: From this section, you can assign the desired category to your file.
Details: From this section, you can see the details of the file, and in addition, you can send this file to the admin.


Delete: You have the option to easily delete your file from this section.
Tip: You should know that the number of files you can upload depends on the version you are using.
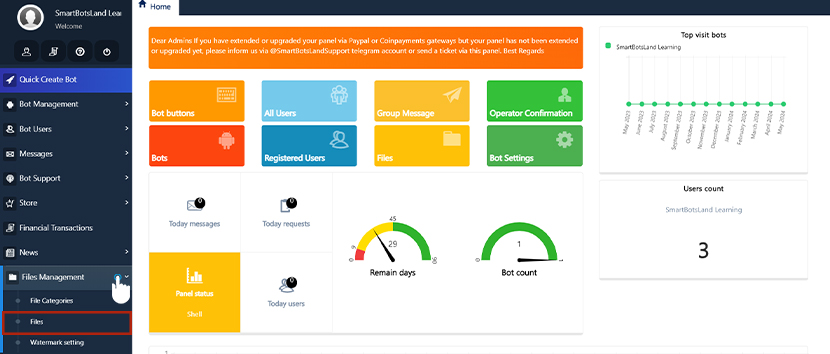
Upload through the admin panel
To upload files and photos directly through the admin panel itself, you must go through the following steps:
1. Enter your admin panel (dashboard).
2. Click on “File Categories” from the “File Management” menu.
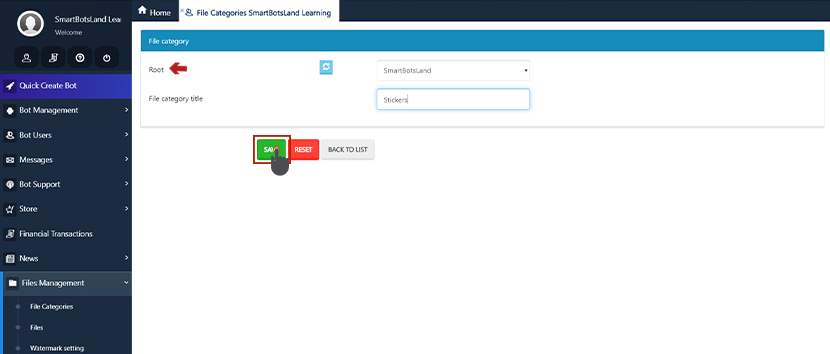
3. Then click on the “New” button.
4. So define the title for your category.
Tip: You can consider some categories as subsets of other categories.
5. Once you’ve set your category title, head back to the “File Management” menu and select “Files.”
6. Click on the “New” button.
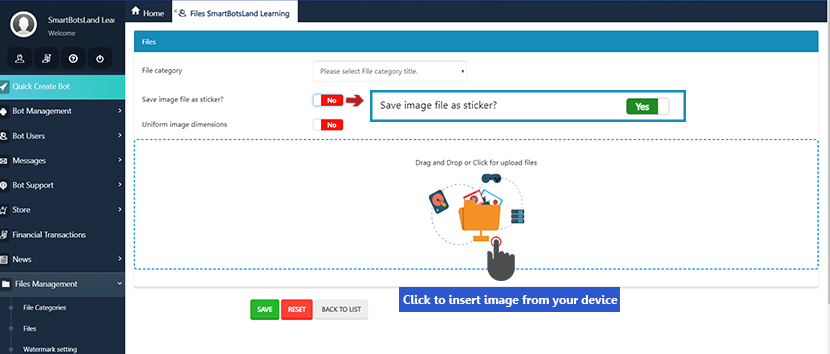
7. On the new page, you have to set some information about your file, which I will explain each one below:
File category: Assign the appropriate and desired category to the file.
Save the image file as a sticker: If you want to use a photo in your bot as a sticker, you can activate this option.
Note: Remember, your photo must be transparent for the bot to convert it into a sticker.
Uniform image dimensions: You can activate this option to specify the size and location of the photo (Fit Mode).
Important Notes for File Upload
- File Size Consideration: Avoid uploading files with large sizes directly to the admin panel. If you need to upload high-quality photos, it’s best to do so through your Telegram bot.
- Easy Upload Process: Whether you prefer dragging and dropping files or clicking to select them, our platform allows you to upload as many files as you need effortlessly. Once you’re done, simply tap the “SAVE” button to apply your changes.
- Bot Integration: Keep in mind that when you upload photos through the admin panel, they will also be uploaded to your bot. However, these photos will not be visible to your users; they are solely for your reference.
[/cz_title]

No comment