How to Limit Access to Telegram Bot Buttons in SmartBotsLand
Managing which buttons are visible and accessible to your bot users is an important part of creating an organized and secure experience. In this guide, we will explain how to limit access to bot buttons in SmartBotsLand. You will learn why this feature is useful, see real-life examples, and follow detailed steps to set it up. By the end of this tutorial, you will be able to control who can see and use specific bot buttons with confidence.
Why limit access to some buttons?
When you manage a Telegram bot with many features, showing all buttons to all users can make the interface look messy and confusing. Firstly, limiting access helps to keep the bot interface clean by showing only relevant content to each user group.
Secondly, it allows you to display exclusive content or offers to certain users. For example, you can show a “Discount” button only to VIP customers or display a “Staff Tools” button only to your support team.
Lastly, restricting button access can increase security. For instance, admin-related buttons should only be visible to verified administrators to prevent misuse
Real examples
-
VIP Discounts: A “Special Offers” button visible only to the VIP group.
-
Paid Downloads: A “My Downloads” button visible only to Registered users who completed registration.
-
Internal Tools: “Admin Reports” visible only to Staff group.
The exact workflow (do these in order)
Create the button you need
You must have the button first; later you’ll limit access to it.
-
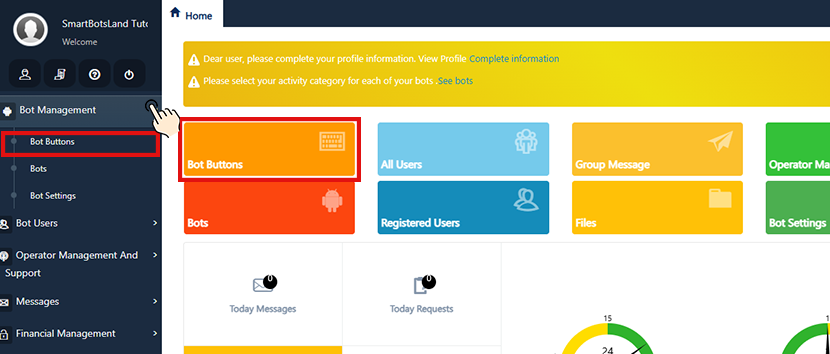
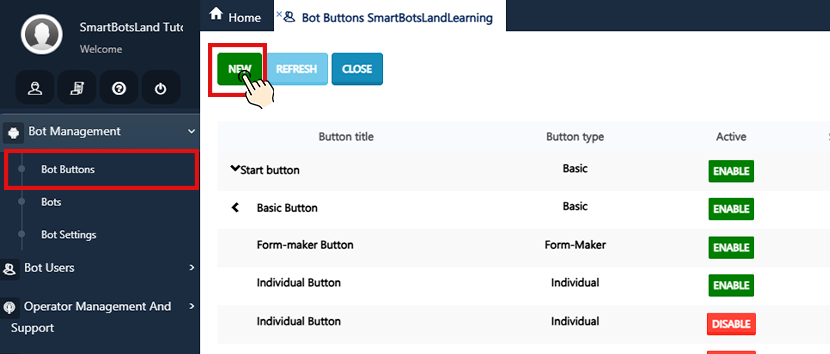
Go to your panel → Bot Buttons.

-
Click the “New Button.”
More Information: How to Create Bot Buttons?
Tips
-
Keep labels short and action-oriented (“Get Discount,” “My Orders”).
-
Place public buttons in the main menu; keep restricted buttons inside a sub-menu if you prefer extra privacy.
Enable the Register button
Users must be able to register; only then can they belong to groups and see restricted buttons.
-
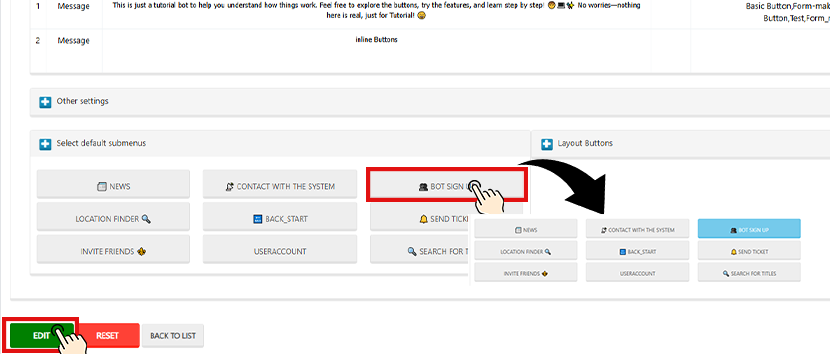
In “Bot Buttons,” make sure a “Sign Up” button is active.
-
Place it in a visible spot so new users can easily register.
More Information: How to Activate the Sign-Up Button?
Notes
-
Registration is the foundation for grouping users.
-
Without registration, a user can’t be part of any group.
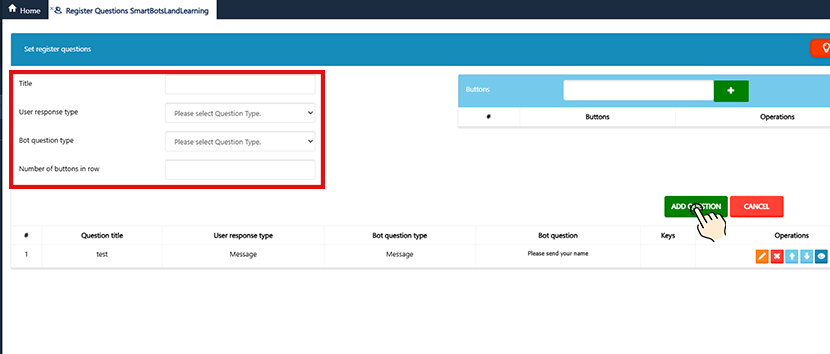
Add a registration question (prerequisite for grouping)
If your button should only be visible to registered users, you must first add a registration question. This ensures that only users who complete the registration can be placed into the required user group.
Important: Adding a registration question is a prerequisite for building a user group for registered members
Users must answer at least one registration question so they become Registered Users and qualify for being grouped.
-
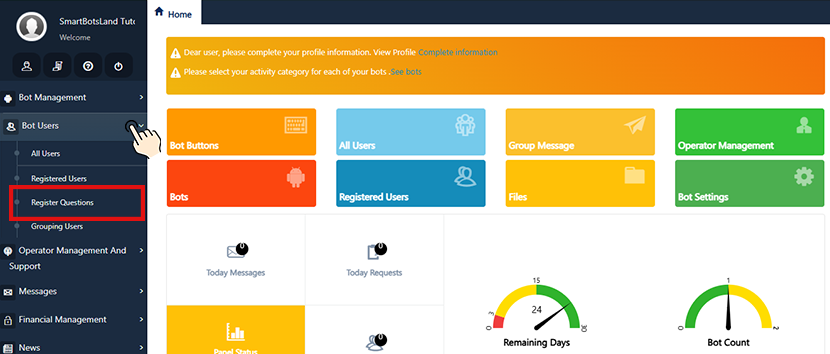
Go to the “Bot Users” menu and choose the “Register Questions” section.
Guidance
-
You can start with one simple required question.
-
Keep questions short. The goal is to mark the user as “registered” so you can group and filter them later.
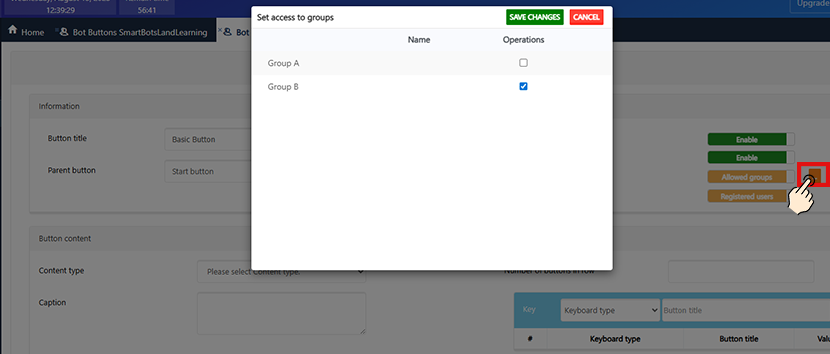
Create a User Group
Before limiting button access, you must have a user group ready. This group determines who will be able to see the button.
For example: You can create a group for VIP customers, registered members, or internal staff
-
Go to the “Bot Users” menu and choose the “User Groups.”
-
Click Create Group and name it (e.g., “VIP Customers,” “Staff”).

More Information: How to Create a User Group?
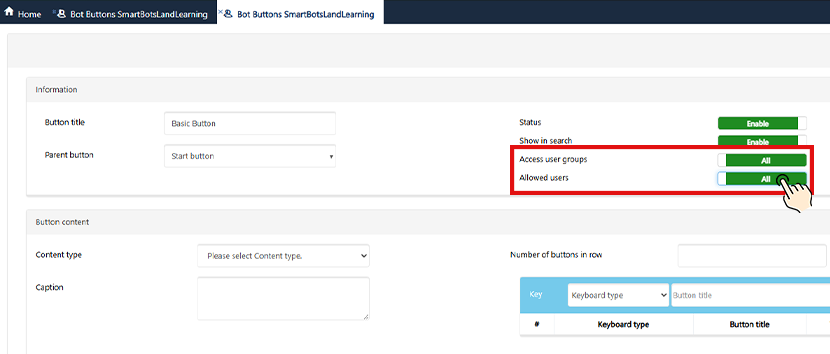
Edit the button and limit its access
Now go to your bot’s panel and find the button you want to restrict. In the button settings, choose the user group that should have access. Once saved, the button will only be visible to members of that group.
Example:
-
A “Special Offers” button for VIP customers
-
A “Delivery Status” button for registered buyers
-
An “Admin Tools” button for staff only
-
Go to Bot Buttons, find your target bbutton, andclick Edit (the pencil icon).
-
In the Information section, find:
-
Access user groups
-
Allowed groups
-
-
Change Access from All users to Registered users (for basic restriction)
or choose Allowed groups and select a specific group (e.g., VIP, Staff). -
Save.
-
Troubleshooting & tips
 Troubleshooting & tips
-
Button still visible to everyone?
-
Recheck the button’s Access field (must be “Registered users” or a specific Allowed group).
-
Make sure the test user is not in the allowed group.
-
-
Registered users can’t see the button?
-
Confirm they actually completed registration (answered the question).
-
Ensure they’re added to the correct group if you used Allowed groups.
-


No comment