Telegram Bot Registration
In any system where users must provide personal information and create an account, registration plays an essential role. The same applies to Telegram bots.
By enabling registration in your bot, you can:
- Collect the required information from users (e.g., name, phone number, ID).
- Save this information directly in your bot’s admin panel (Dashboard).
- Separate registered users from normal users.
- Control access levels and services for different types of users.
Benefits of Telegram Bot Registration
Registering users in your bot brings several advantages:
- One-time and permanent registration: User information is stored once and reused.
- No duplicate entries: Users don’t need to provide the same data repeatedly.
- Access control: You can manage what each user is allowed to access inside your bot.
How to Enable Registration in SmartBotsLand
Step 1: Activate the “Sign Up” Button
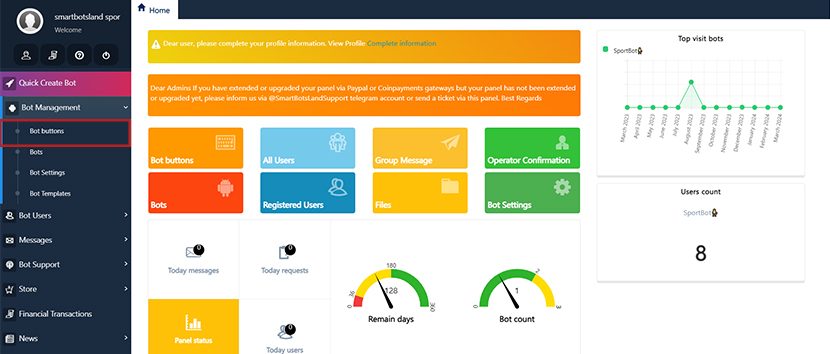
- Log in to your admin panel (Dashboard).
- From the Bot Management menu, select Bot Buttons.

- Click the edit icon in front of your desired button (e.g., the Start button).
- In the Select default submenus section, enable the Sign Up button (turn it blue).
- Save your changes.
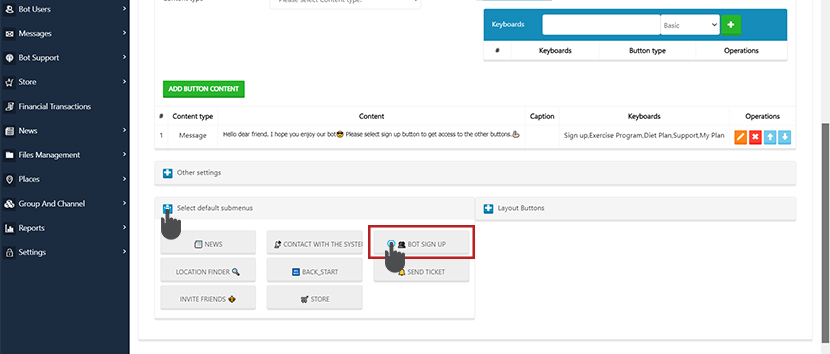
👉 From now on, when users click Sign Up, they will be asked to answer registration questions.
Step 2: Create Registration Questions
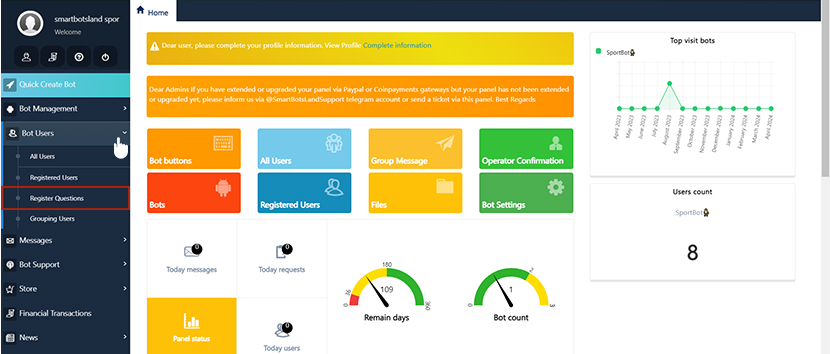
- In the Dashboard, open the Bot Users menu.
- Select Register Questions.
- Add your registration questions.
Here’s how to customize them:
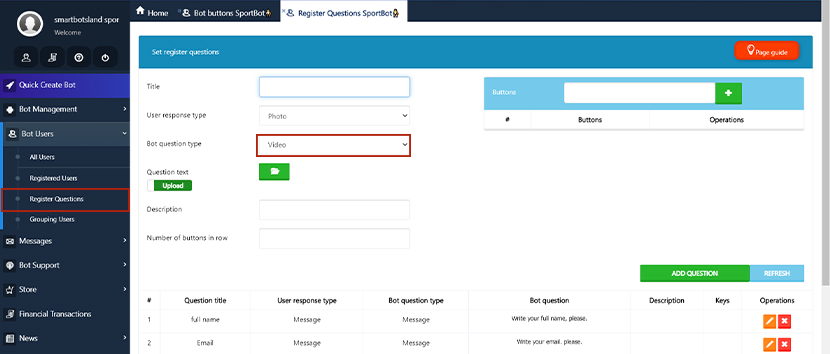
Title: You have to choose a title according to your needs. For example: full name, phone number, national code and etc.
User response type:
Bot question type: In this section, you can specify the type of bot’s question. For example, a photo, a video or message.
- If you select the “Message” option from “Bot question type” menu, you can write your question.
- If you select the “Video” option from “Bot question type” menu, you have to upload your file, video, photo, …
- Title: You have to choose a title according to your needs. For example: full name, phone number, national code and etc.
- User Response Type: In this section, you can specify the type of user’s answer to each of your questions. For example, a photo or a video
- All: Users can send multiple answers.
- If you select the “Message” option from the “User response type” menu, you get two more options which are explained to you below:
- Answers Format: You can choose one option. After selecting one of the options, your customers will need to enter the option you desire.
- Response length: In this section, you can set the length of text that your user entered.
- Bot Question Type: Define how the bot asks the question (text, photo, video).
- For Message, type your question.
- For Media, upload your file (image, audio, video, etc.).
💡 Tip: You can create button-style answers. For example, when asking about gender, users can select Male or Female instead of typing.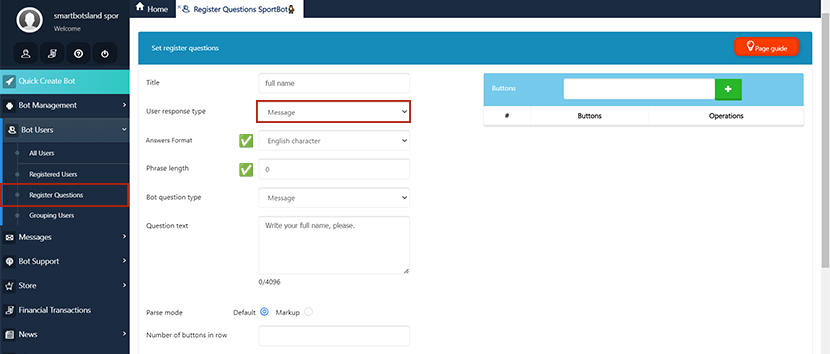
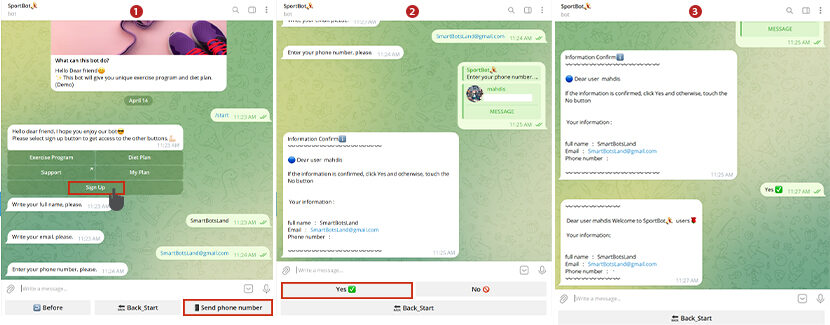
User Registration Flow (From User’s View)
Here’s what happens when a user registers:
- The user sends /start in your bot.
- The Sign Up button appears.
- After clicking, the user must answer your registration questions.

- Once registration is complete, the Sign Up button disappears (they won’t see it again).
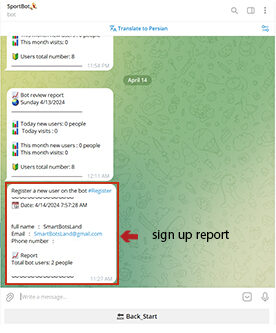
- The operator receives a detailed registration report.
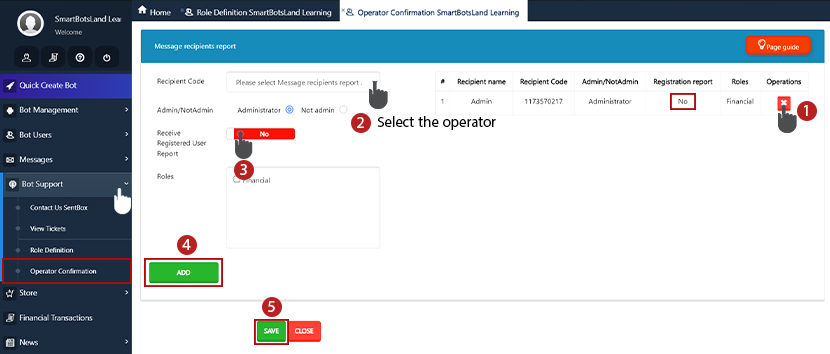
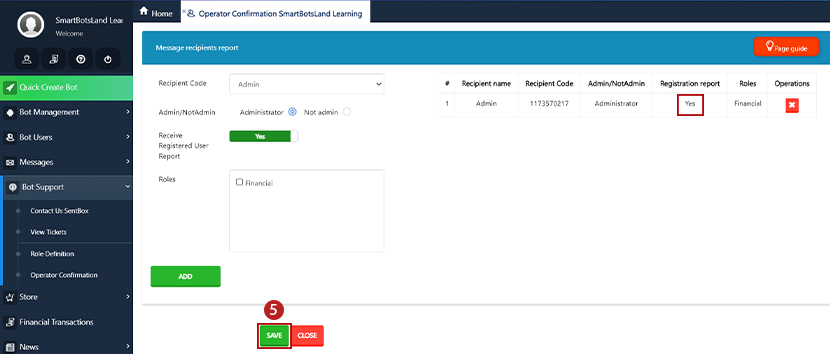
📌 If the operator doesn’t receive reports, you need to configure it:
- Go to the Bot Support menu → Confirm Operator.
- Delete the operator if the Registration Report status is “No”.
- Add the operator again and enable Receive Registered User Report.
Managing Registered Users
You can view all registered users by going to Bot Users → Registered Users.
For each registered user, there are 5 action icons:
- Group Membership – Assign the user to a user group.
-
Related: How Grouping Telegram Bot Users?
-
- Details – View complete registration details.
- Delete – Remove the registered user.
- ⚠️ Note: You cannot delete users if they have individual buttons or are operators.
- Send Message – Send a direct message to the user.
- Individual Buttons – Assign special content or buttons only for that user.
Restricting Bot Buttons for Registered Users
You can restrict certain buttons so that only registered users can access them.
- Go to your Dashboard.
- From Bot Management, select Bot Buttons.
- Click the edit icon in front of your desired button.
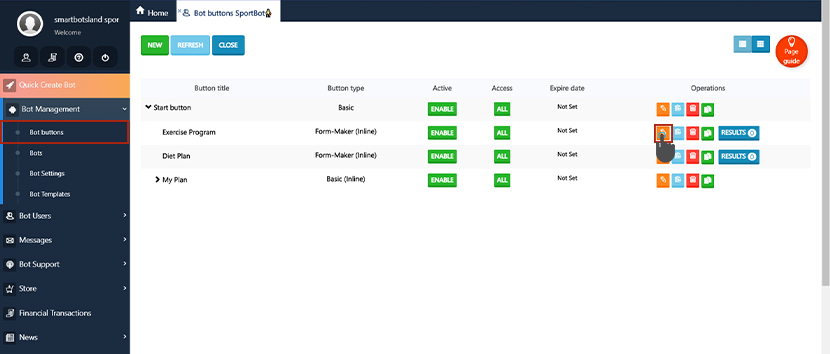
- In the Allowed Users section, set restrictions so only registered users gain access.
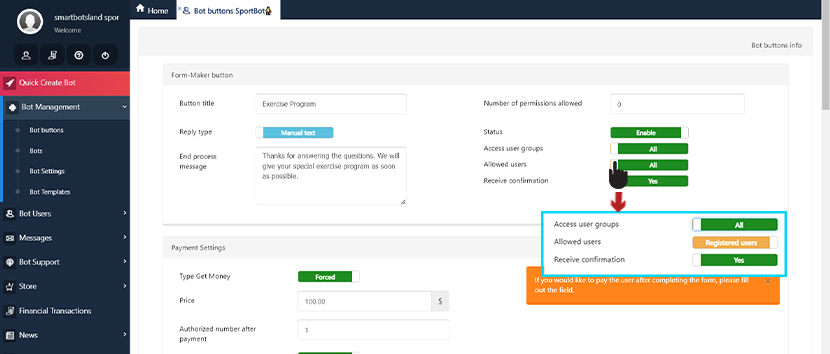
This ensures that advanced features, premium content, or additional services are available only for users who have completed registration.
Register users
You can see the list of your register users from “Bot users” menu then click on “Registered users” option.

So you can see 5 icon in front of each person which explained them in the below:
![]()
1. Group Membership : Through this icon you can select the group and the user will be placed in that group.
2. Details : By this icon you can see the details of registration user.
3. Delete : You can delete the registration user by this icon.
Tip: You can not delete them if they have individual button or they are operator.
4. Send Message : you can send message to your desire register user by this icon.
5. Individual buttons : you can set content for each user here
Tip: you can restrict your bot button so if your user becomes a registered user, they can access a series of bot buttons and a series of additional services.


This article helps me a lot with creating my bot buttons?
That’s our honor to hear that. Thanks
How can I create multiple questions?
If you would like to ask questions and get information from your user, you can write all of your questions via Form maker button
Thank you smartbotsland for the great platform you have for building Telegram bots.
Are registered users also categorized?
Thank you. You have to categorize your users in the panel. Check this to get more detail: https://smartbotsland.com/bot-users/how-to-manage-telegram-usersgrouping-users/
[…] Step 1: You need to activate the “sign up” button and also create registration questions. Your users have to answer these questions to see your groups. If you would like to know more about “sign up” button, check this. […]
[…] Related: Activating the Sign up Button in Your Bot […]