
What Is the “Individual Button” in a Telegram Bot?
The Individual Button is a special type of button you can create using the SmartBotsLand panel. It’s designed for showing personalized content to each registered user in your Telegram bot.
For example:
-
A student can see their own grades.
-
A fitness client can access their private workout plan.
-
An employee can download their payslip.
Therefore, this feature is perfect when you want each user to see only the content that applies to them.
How to Create an Individual Button
-
To begin, log in to your SmartBotsLand panel.
Next, follow these steps:
-
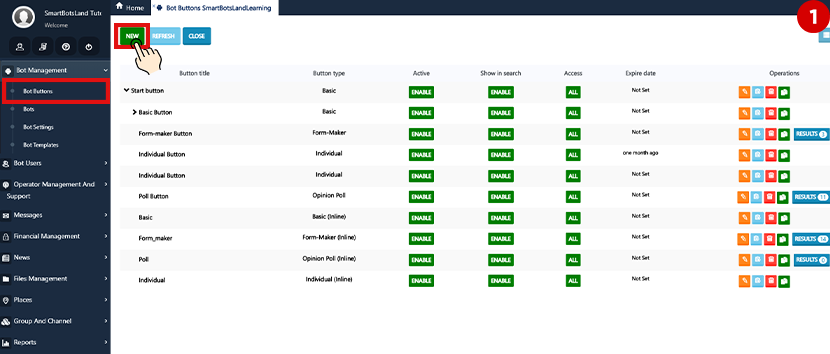
Go to the “Bot Buttons” section in the left menu.

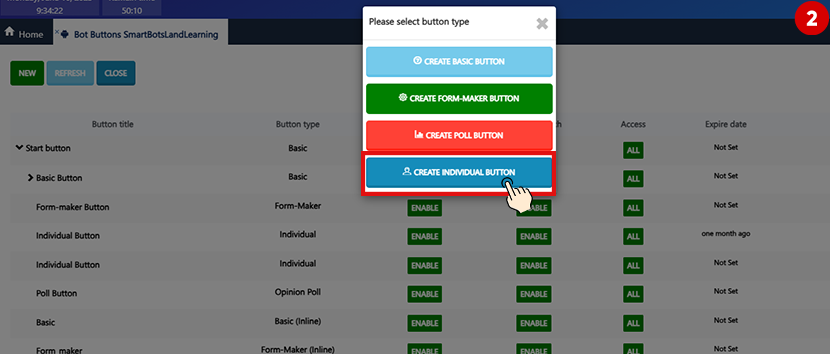
-
Then, click the “New” button and choose “Individual Button.”
-
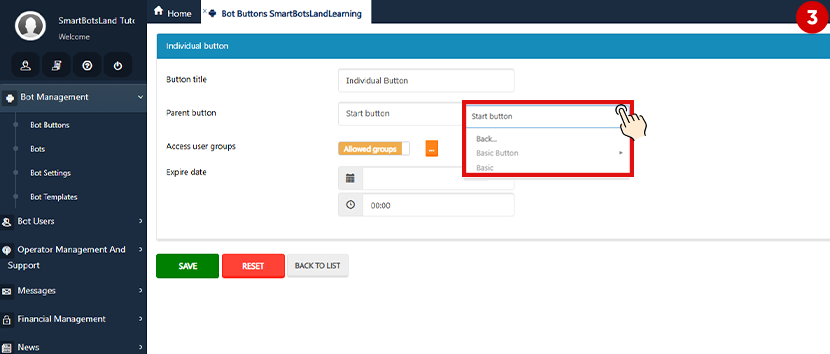
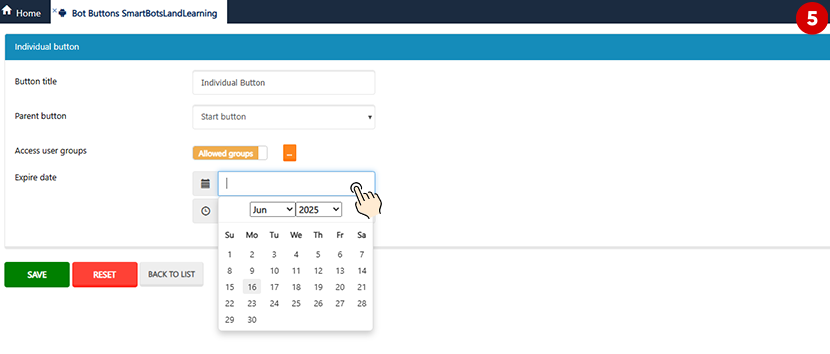
After that, set a Title (for example, “My Diet Plan”).
-
If needed, choose a Parent Button to organize your menu better.
-
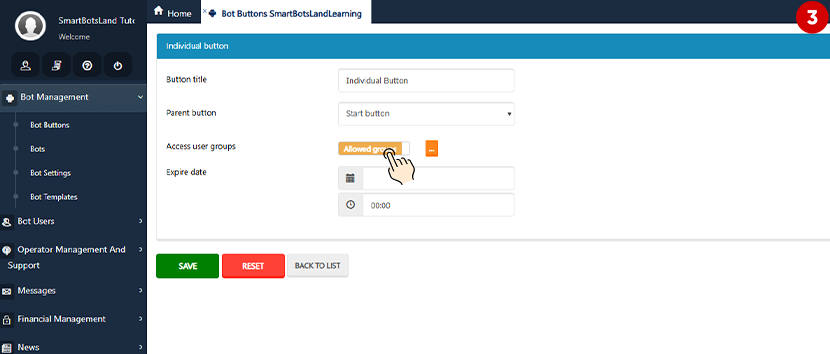
Additionally, you can choose which user groups should have access to this button.
-
If the button should only be available for a limited time, set an Expiration Date.
-
Finally, click Save to complete the process.
As a result, your new individual button will appear in the bot menu for users who have permission to view it.
-

How to Add Content to the Individual Button
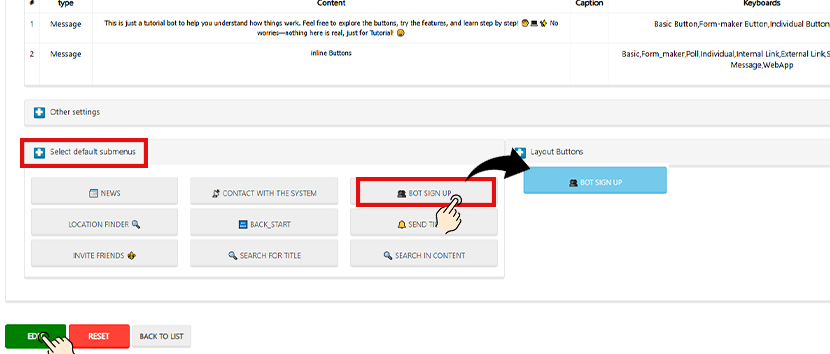
Before adding content, make sure your bot has the Registration Button enabled. Only registered users can receive personal content.![]()
 To add content:
-
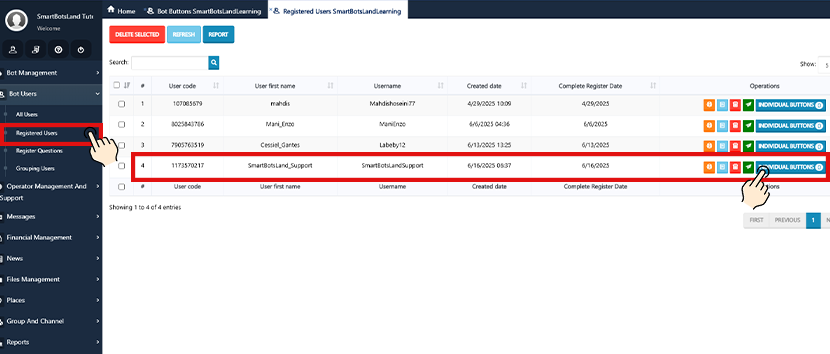
First, go to “Bot Users” → “Registered Users.”
-
On the user list, click the “Individual Button” icon next to the user.
-
Then, click “New” to start adding content.
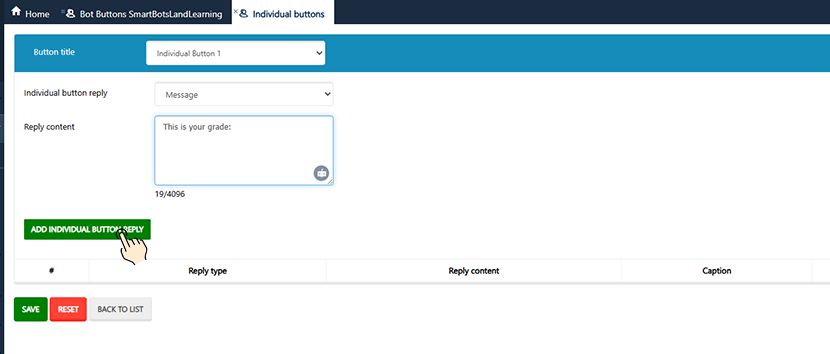
-
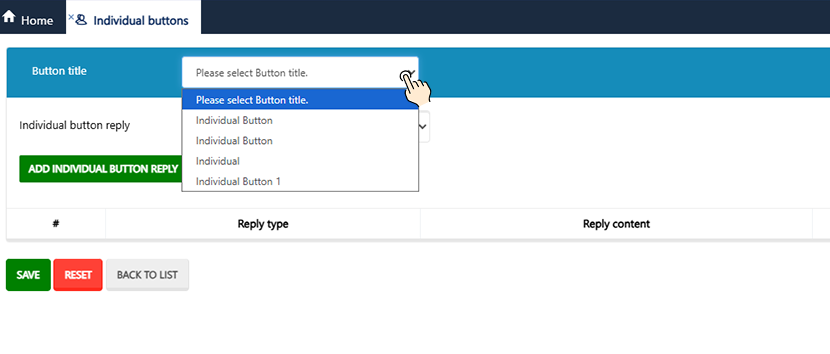
Choose the Button Title you created earlier.
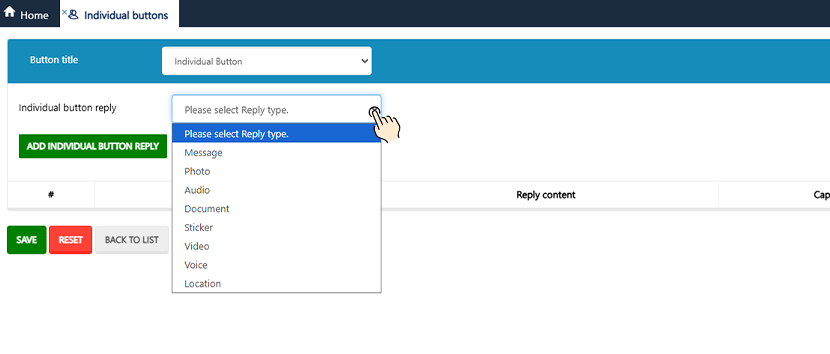
-
Next, select the Content Type (e.g., Text, File, Photo).
-
After writing or uploading your content, click “Add Individual Button Reply.”
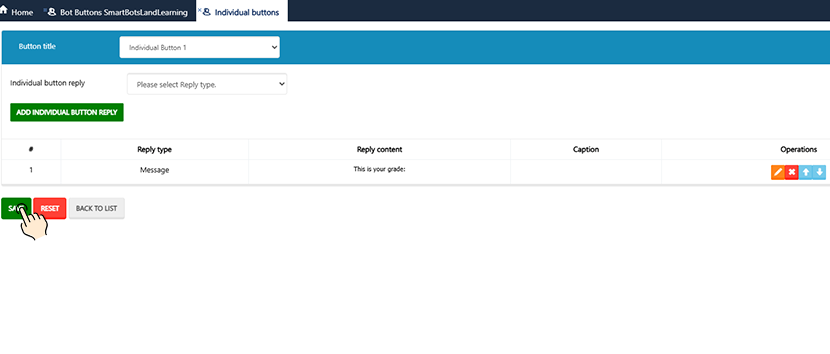
-
Lastly, click Save to apply the changes.
For example, you can upload a PDF meal plan, a voice note, or even a training video—and only that user will receive it.
Important Notes
-
Keep the following tips in mind:
-
Only registered users can receive content from individual buttons.
-
You must assign an operator to your bot before uploading photos or files. Otherwise, the system cannot send the file to the admin bot, and you’ll get an error.
-
If you haven’t added any content, users will see this message:
“This button has no content for you.” -
If the user hasn’t registered, the bot will prompt them to complete the registration first.
-
What Your User Will See
Once you’ve added content, the user can simply tap their Individual Button (e.g., “My Diet Plan”) in the menu. Instantly, they’ll receive the specific file or message you’ve prepared—no one else can view it.


[…] Tip: Learn how to create individual button in SmartBotsLand […]