What is a Basic Button in SmartBotsLand?
The Basic Button is one of the most useful buttons in SmartBotsLand. It lets you show different types of content to your bot users, like messages, photos, videos, and more.
Example:
Imagine you’re a restaurant owner. You can create a button called “Menu,” and when users tap it, they’ll see the menu image or details you’ve added.
Or if you’re a teacher, you can create a button called “Class Rules,” and students will see a list of your rules when they click it.
How to Create a Basic Button
-
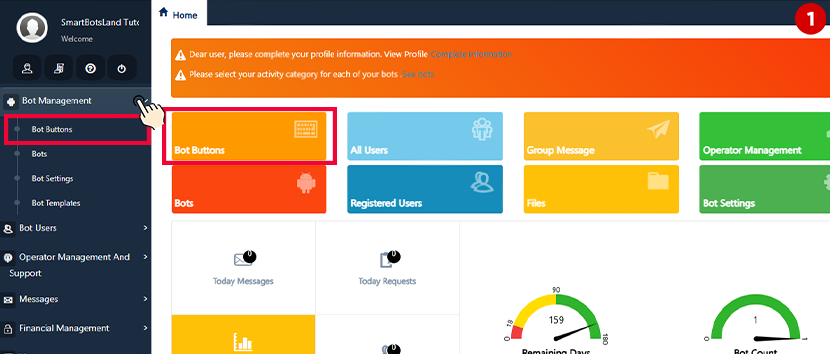
Log in to SmartBotsLand.

-
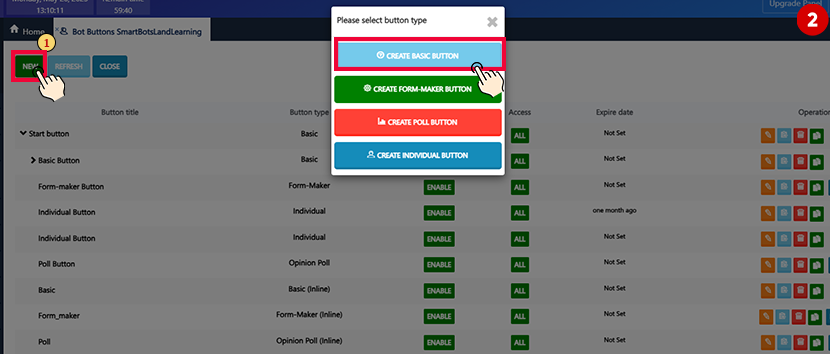
On the Home Page, click “Bot buttons”, then tap “NEW” button.
-
Choose “Basic Button.”
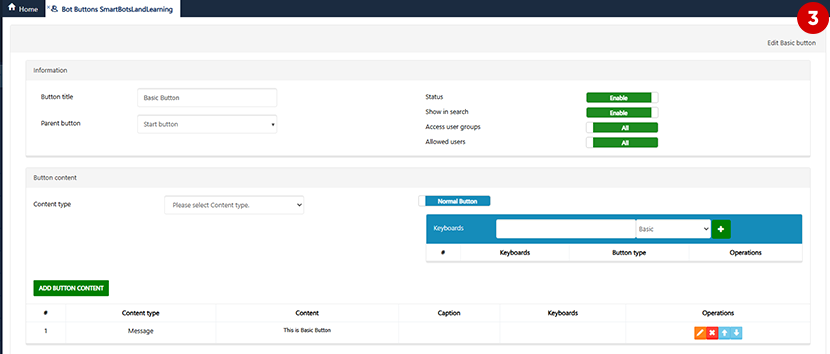
Basic Button Settings
Here’s what each setting means:
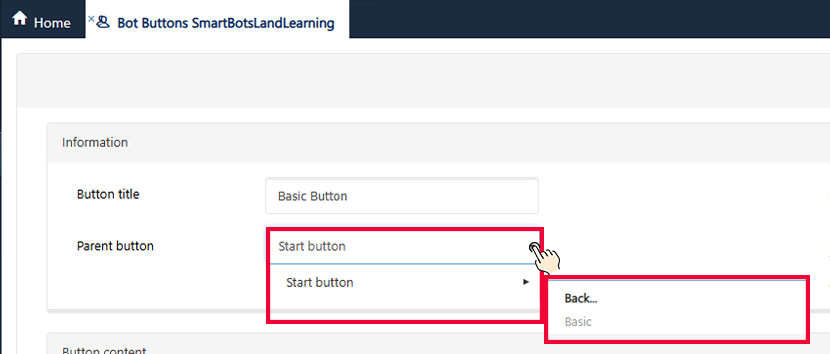
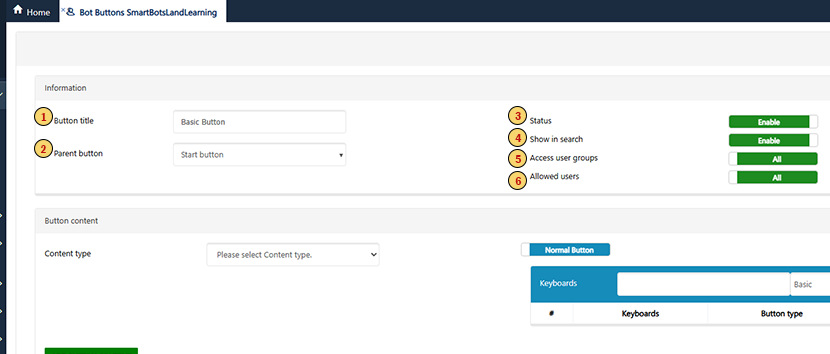 Button Title
Enter the name of your button (e.g., “About Us,” “Rules,” or “Menu”).
Parent Button
Choose where this button will appear. You can place it:
-
In the Start Menu
-
Under another Basic Button
Button Visibility (Status)
Enable or disable the button. If disabled, users won’t see it.
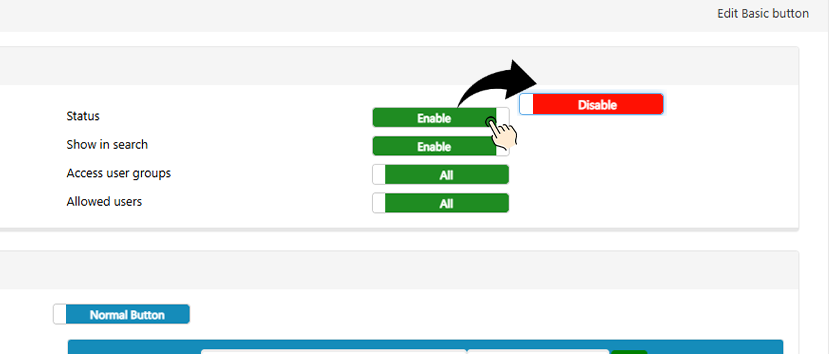
Show in Search
If you’re using the Pearl or Island version of SmartBotsLand, you can activate the “Search” button in your bot.
This allows your users to search for button titles or even search inside the content of your Basic Buttons.
If you disable this feature for a button, that button will not appear in search results for users.
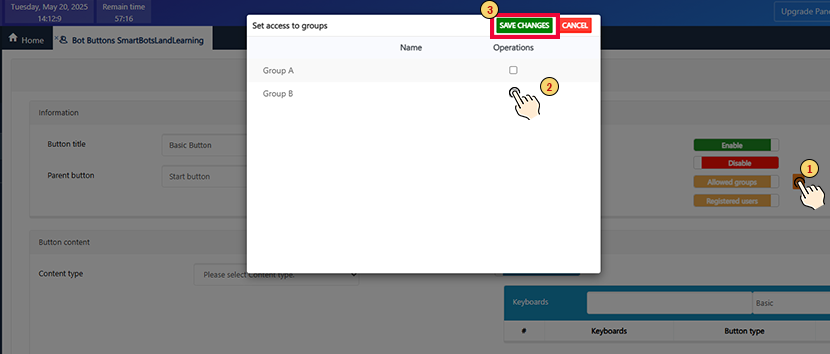
Access Settings
You can control who can see this button:
-
All Users: Everyone sees it
-
Registered Users: Only those who registered
-
User Groups: Choose specific user groups (e.g., premium members)
Tip: If you don’t know about user groups, check our tutorial on grouping users.
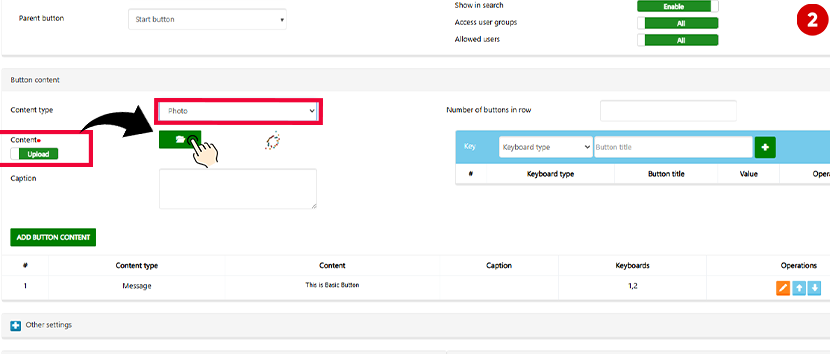
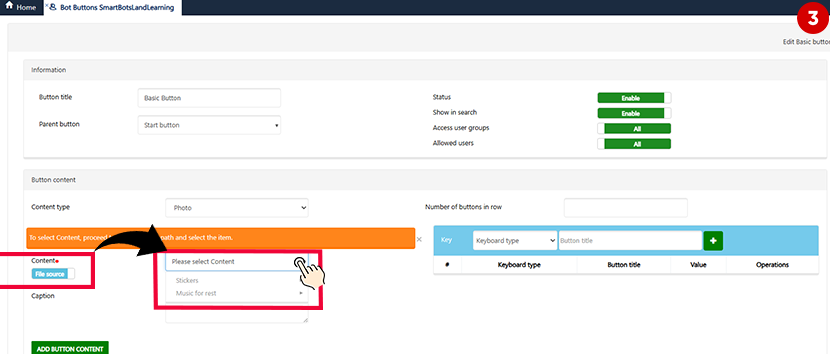
Button Content
 Button Content
Now add the actual content your users will see when they click the button.
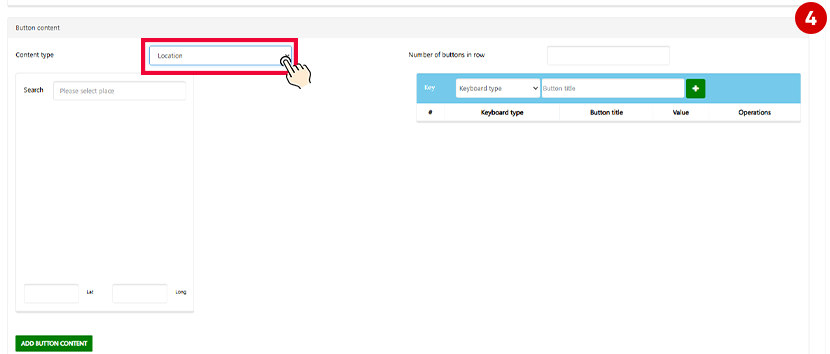
Content Type
Choose the type of content you want to show:
-
Text message
-
Photo

-
Video
-
Audio
-
Voice message
-
Document
-
Sticker
-
Location
-
Webservice (for advanced users with coding knowledge)
Tip: You can add multiple messages to one button and control how many are shown at once.
Link Preview
Enable this if you want to show image/video previews with your links.
Button Size
You can choose the size of your button. Using a small size is usually better, especially when you have many buttons.
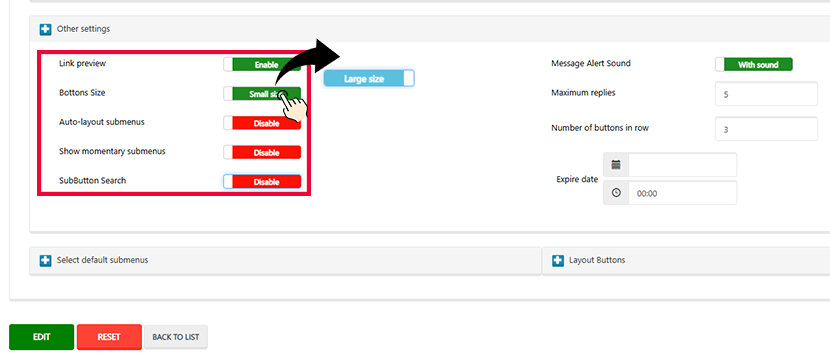
SubButton Search
If you enable this option and the Search feature is also active for this button, then when users search something, only the sub-buttons of this button will appear in the search results.
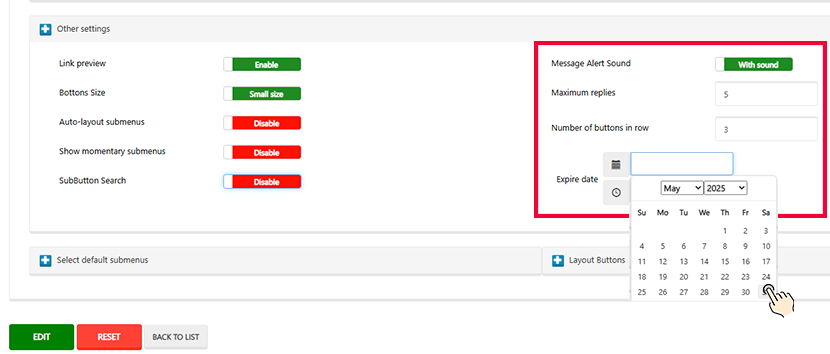
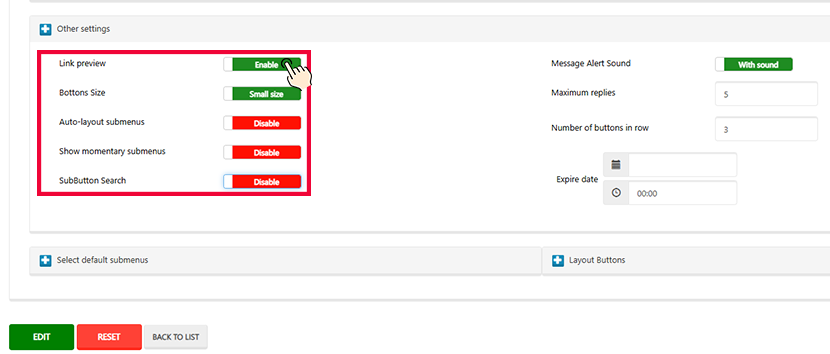 Maximum replies
If your button content includes many photos (or other media), you can limit how many will be shown when the user clicks the button.
Number of buttons in row
You can set how many buttons appear in each row (1, 2, or more) to make your layout look neat.
Message Alert Sound
Play a sound when users click the button (optional).
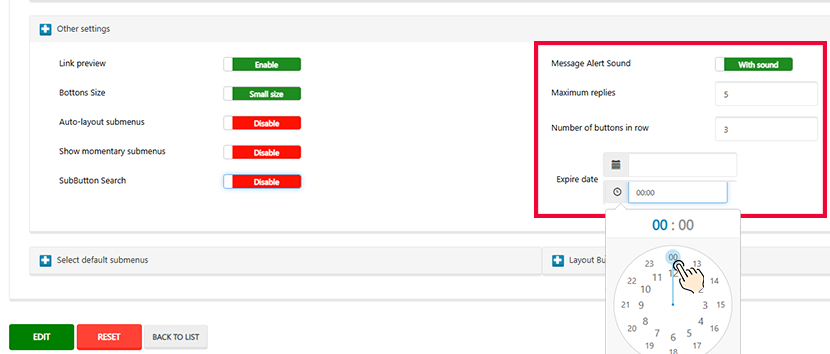
Expiration Date
You can set a date when the button will stop showing to users.
Sub Buttons (Optional)
 Sub Buttons (Optional)
Basic buttons can also contain sub-buttons, which means when users click the button, they see a list of more buttons underneath.
For example:
-
Courses
-
English Course
-
Math Course
-
History Course
-
To add sub-buttons:
-
Create new Basic Buttons.
-
Set their Parent Button to the main button (like “Courses”).
Examples of Basic Buttons
🔹 Example 1: “About Us”
-
Content type: Message
-
Content: “We are a language academy offering online English and French classes.”
🔹 Example 2: “Location”
-
Content type: Location
-
Your school’s or store’s location
🔹 Example 3: “Contact Us”
-
Content: Text message with phone number, email, Telegram support link
🔹 Example 4: “Rules”
-
Content: List of group/channel rules
-
Access: Only registered users
-
Expiration date: Set to change rules later
🔹 Example 5: “Online Course”
-
Sub-buttons:
-
Lesson 1 (video)
-
Lesson 2 (PDF)
-
Assignment 1 (document)
-

No comment