Grouping Telegram Bot Users
If you own a Telegram bot with many users, managing them effectively can be a challenge. That’s where the grouping Telegram bot users in SmartBotsLand feature comes in. It allows you to organize users into groups directly from your admin panel, making it easier to provide targeted content, control access, and improve your marketing strategy.
Why Grouping Telegram Bot Users Matters
By grouping your bot users inside the SmartBotsLand dashboard, you gain more control and flexibility over how you manage your community. Here are some key benefits:
- Targeted services – Send different content or provide specific services to selected user groups.
- Custom communication – Deliver tailored messages to groups based on their interests.
- Access control – Restrict certain bot buttons or features only to specific groups.
- Better organization – Keep your users structured for smoother management.
- Smarter marketing – Offer promotions or content that match each group’s needs, resulting in higher engagement.
Also, you can categorize your users based on their characteristics, interests, and needs offers several benefits:
- Have better and more regular management of your users.
- Provide more authentic and attractive content to establish a stronger relationship with your users.
- According to the needs of each group, you can have better and more successful marketing.
How to Group Telegram Bot Users in SmartBotsLand
Follow these steps to create and manage user groups:
Step 1: Activate the “Sign Up” Button
-
- First, enable the Sign Up button and create registration questions.
- Users must answer these questions before they can see or join groups.
Related: How to activate the Sign Up button?
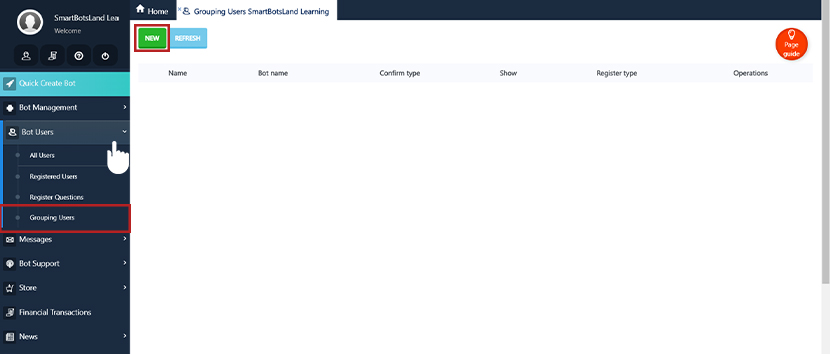
Step 2: Open the User Grouping Section
- From the Bot Users menu, select Grouping Users.
- Click on the New button to create a group.

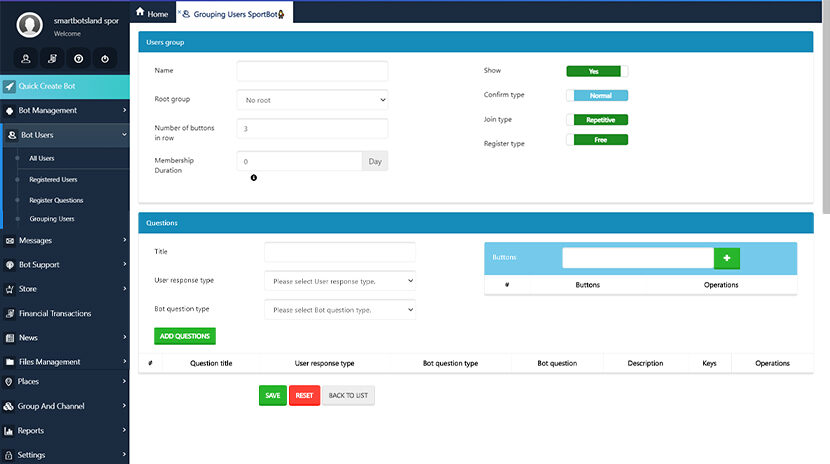
Step 3: Fill in User Group Information
When creating a new group, you need to complete the following fields:
-
- Name: Choose a title that fits the group’s purpose.
- Root Group: Set the parent (if this group is a subgroup).
- Number of Buttons in a Row: Decide how many buttons appear per row.
- Show/Not Show: Control whether users can see and join the group automatically.
- Confirm Type:
-
- Normal → The operator must approve the user before joining.
- Automatic → The user joins instantly after registration.
-
- Join Type: If set to Repetitive, users can join the group multiple times.
- Membership Duration: Define how long the membership lasts before expiry.
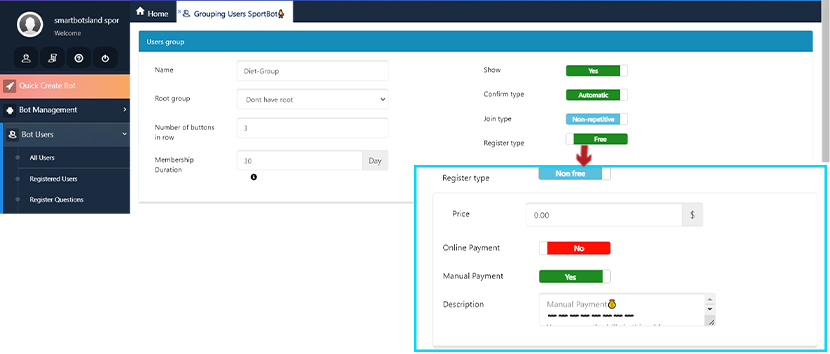
- Register Type: Choose between Free or Non-free (paid subscription).

-
Step 4: Referral System
You can set up referral rewards for each user group. For example:
-
Admin can define how many points or how much money users earn when they invite new members to that specific group.
-
You can even choose whether the reward should be given only once for the first join or every time a referral joins.
This gives you full control over user movement and reward strategies, making your bot more engaging and motivating for users.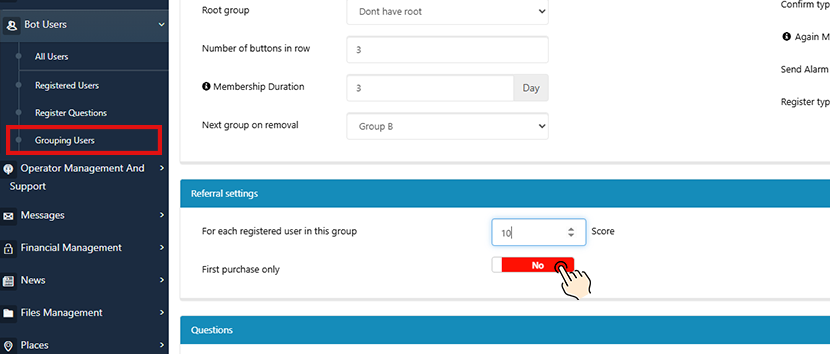
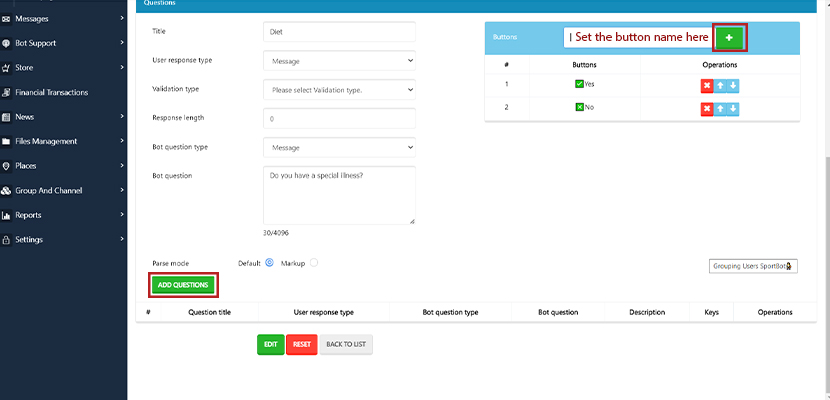
Step 5: Add Membership Questions
You can create questions that users must answer before joining a group.
- User Response Type:
- All → Users can give multiple answers.
- Message → Allows custom text responses with rules for format and length.
- After setting questions, click Add Question and then Save.

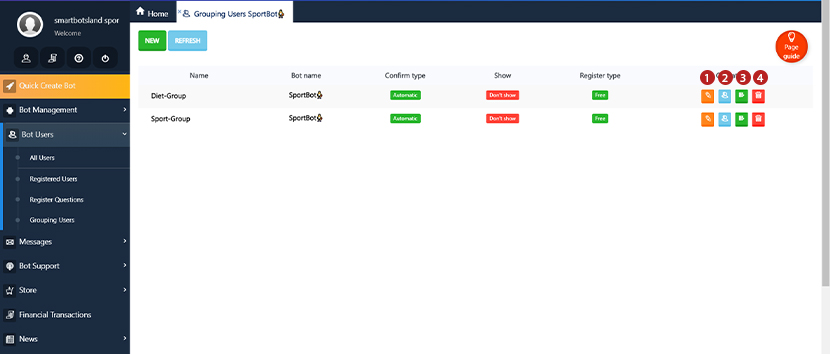
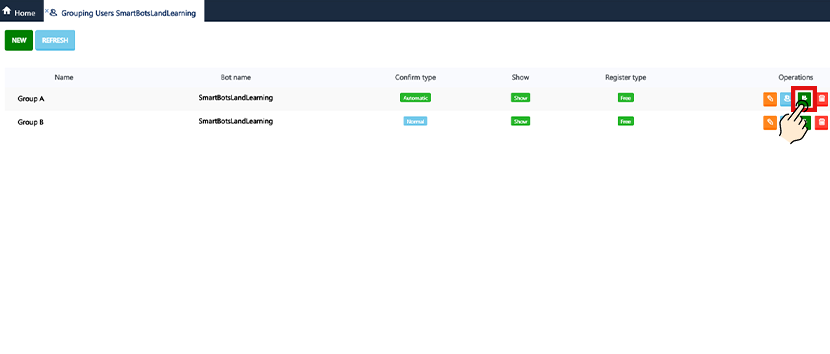
Step 6: Manage User Groups
After saving, you’ll see icons next to each group:
- Edit – Modify group settings.
- Users – View or manually add users to the group.
- To manually assign users: go to Registered Users > click the orange “Group Membership” icon.


- Access – Decide which bot buttons this group can use.
- You can also set access while creating/editing bot buttons.
- Delete – To remove a group, you must first delete its members and form results.
Managing User Groups & Access in Your Bot
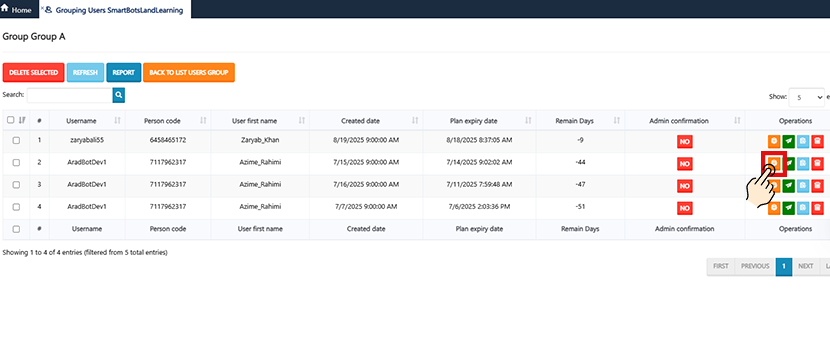
Add Users to a Group
- Go to “Bot Users” → “Registered Users.”
- In front of each user’s name, you’ll see an orange “Group Membership” icon.
- Click it, select the group, and the user will be added there.
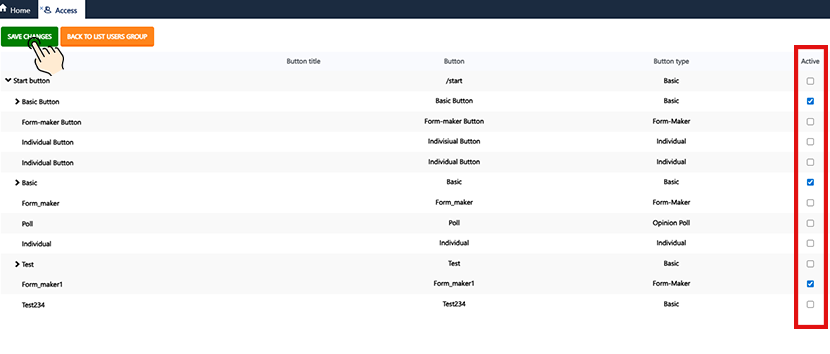
Set Access for User Groups
With this option, you can define which bot buttons are available to members of a specific group.
👉 You can do this in two ways:
Method 1: From the User Group
- Use the Access button inside the group settings.
- Choose which buttons are visible for this group.
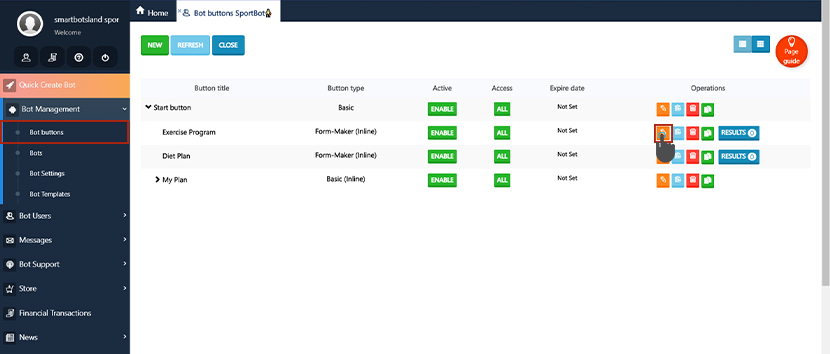
Method 2: From the Bot Button Settings
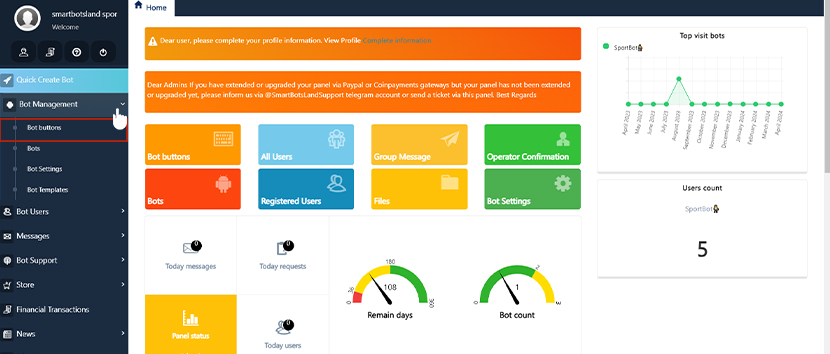
- Go to “Bot Management” → “Bot Buttons.”
- Click the edit icon in front of the button you want to manage.
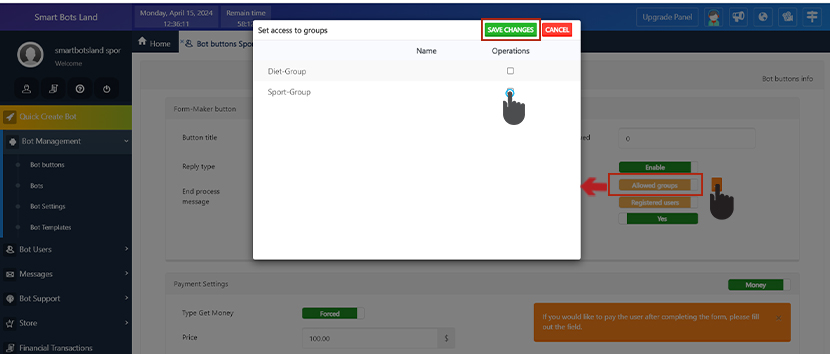
- In the first section, find “Access User Groups.”
- Under “Allowed Groups”, click on the “Access to User Group” icon.
- In the pop-up, select your desired user group.
- Click “Save Changes.”
💡 Tip: You can set access while creating the button as well.
Delete a User Group
If you want to remove a user group:
- First, delete all members of that group.
- To do this, you must also delete their related results from the Form Maker.
Grouping Telegram Bot Users from the Client Side
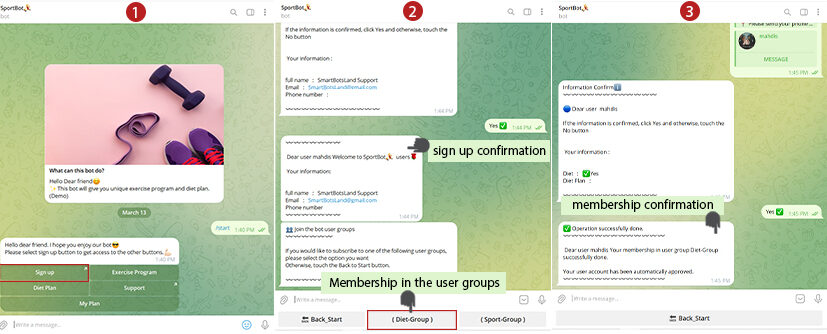
Here’s what happens for your users when groups are enabled:
- The user sends
/startto your bot. - They must sign up and answer registration questions.
- The bot sends a Sign Up Confirmation to the operator.
- Once confirmed, the user can see and join available groups.
- Depending on your settings:
-
When payment is required, users must complete it first.
-
With “Normal” confirmation enabled, the operator reviews and approves.
-
Under “Automatic”, users are added instantly.
-
- The user receives a Membership Confirmation message.
✅ Example: A simple user group can be set with no membership fee and “Automatic” confirmation.


[…] Tip: Learn how to create user group in SmartBotsLand […]